- Countertop Supplies Home
- Concrete Countertop Molds
- Concrete Countertop Mix
- Pigments & Custom Options: Color additives, special effects & decorative add-ins
- Countertop Reinforcement
- Casting Equipment: Tables, mixers, vibrators & curing covers
- Countertop Finishing & Installation
- How to Polish Concrete Countertops
- Sealers for Concrete Countertops
- Delivery and Installation
- Related Reading
- Problems with Concrete Countertops
- Countertop Product Reviews
- Concrete Countertop Basics: Pricing, colors, edge details, and more
How to Avoid Mistakes When Installing Concrete Countertops
Ten common problems and easy solutions for preventing themFor many concrete countertop contractors, the fabricating process is the most trouble-free aspect of the operation. It takes place in a shop under controlled conditions, according to proven mix designs and color formulations, and without an anxious homeowner peering over your shoulder. It's during countertop installation when most of the problems crop up. Sure, some snafus are the result of casting errors, but most are caused by poor preparation, improper measuring, careless handling, and sloppy installation techniques.
Because countertops are such a visible and regularly used element in the home, the last thing you want to do is disappoint clients who have waited eagerly and patiently for the countertop of their dreams, only to receive a product that fails to meet their expectations.
At Solid Solutions Studios, we specialize in crafting custom concrete countertops for residential construction and remodels. Over the years, we've learned some tricks of the trade to avert problems and keep our clients happy. Here are the 10 most common pitfalls we've encountered during countertop installation, along with practical solutions for avoiding or correcting them.
1. The countertop doesn't fit up against the wall properly.
There's no such thing as a straight wall. Even when you measure your template carefully, slight bows could interfere with the proper fit of the countertop, making it too tight in some spots.
To account for bows in the wall, allow for a 1/8-inch gap between the wall and countertop when measuring your template. After countertop installation, any visible gap that remains will most likely be hidden by the backsplash. If not, it can be filled with caulk or tile grout.
If you do end up with a countertop that bumps too tightly against the wall, use a circular saw or angle grinder fitted with a diamond blade to shave material off the countertop edge as needed. Grinding can create lots of dust, so always perform this task outdoors, resting the countertop on sawhorses for support as if planing a door.
As an alternative to grinding, you may be able knock out the drywall to make the pieces fit. This will give you a good 1/2 inch of extra play. In most cases, no one will see where the drywall has been removed if you are careful to take it out only below the top level of the countertop. If a backsplash will be added, you have even greater leeway. Score the drywall neatly with a razor blade and pop it out with a hammer.
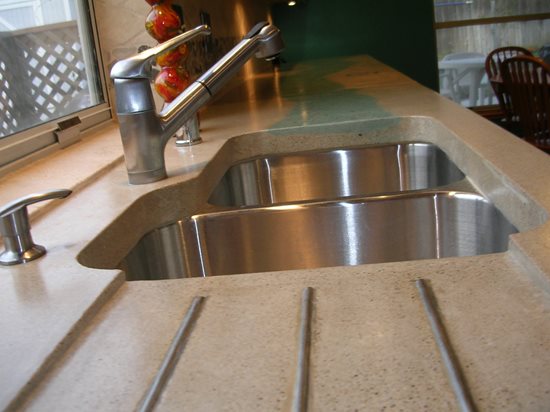
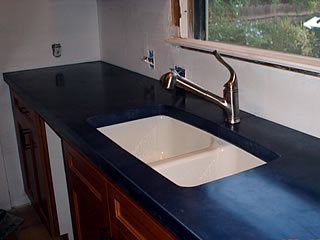
2. After installing the countertop over an undermount sink, you end up with a gap between the sink and the concrete.
Undermount sinks are all the rage in today's kitchens, but installing one is an art and requires the right tools and techniques. Here are some tips for ensuring a snug fit with the countertop.
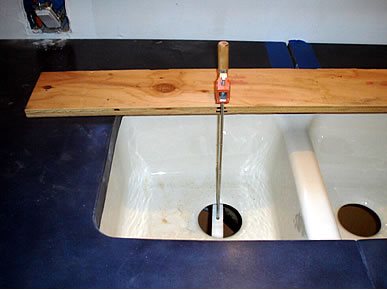
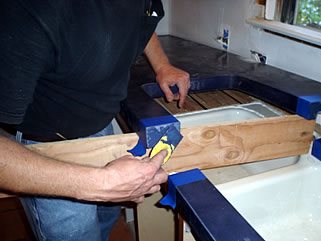
Use a lifting clamp, such as this one, to pull an undermount sink up tightly against the underside of the concrete countertop. One end goes in the drain hole while the other rests on a 2x4 placed across the countertop surface.
During countertop fabrication, shorten the cutout for the sink 1/2 to 3/4 inch on all sides beyond what the template calls for. Doing so will hide any gaps if they do occur.
To help tighten the sink snuggly up against the countertop, special lifting clamps are available that you can stick in the sink's drain hole. You simply place a 2x4 across the countertop and then sit one end of the clamp on the 2x4 and use the other end to pull up the sink. We buy our clamps at Granite City Tool (www.granitecitytool.com).
Proper shimming of the sink is also crucial. We use a mounting system called Sink Undermounter, manufactured by Vance Industries (www.vanceind.com). It consists of two metal rails that you extend across the base cabinet and hang by clips mounted to the frame. You set the sink on the rails, and then place the countertop on the sink. The rails have 2-inch adjusting bolts that can be turned as necessary to raise and level the sink flush with the underside of the countertop.
Finally, to prevent any water seepage around the sink after installation, don't forget to caulk thoroughly where the sink comes in contact with the underside of the countertop. Be sure to use a waterproof 100%-silicone caulk.
Insist that your clients choose all their plumbing fixtures, sinks, and appliances (especially built-ins such as cooktops) before you get on the job. It's crucial to have all these items at your disposal to permit "real-world" measuring for your templates. Whenever possible, take the fixtures to your casting studio so they can be dry fit to the countertop before installation.
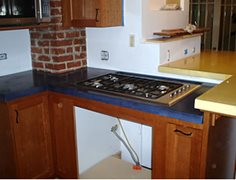
Don't just rely on the manufacturers' spec sheets for appliance dimensions, because they often don't account for small screws, knobs, and other hardware used in assembly. If the measurements turn out to be inaccurate, you could be facing costly rework, with a knockout hole that is too small and needs extensive grinding or cutting, or even worse, a hole that is too large, leaving noticeable gaps for which there is no remedy.
3. You receive a call from the plumber on the project complaining that the countertop is too thick and he can't reach the stem of the faucet to tighten the nut.
To prevent this predicament-and pre-empt plumber aggravation - leave enough space around the base of the faucet hole when casting the countertop for the plumber and his wrenches to maneuver. This is a simple preventive measure, but to be accurate you must have the faucet fixture in your possession when making the template (see "Order Fixtures and Appliances First").
If the hole for the faucet stem does end up being too constricted, some plumbers are able to work around the problem using wrench extensions. The only other alternative is to grind out the hole to enlarge it.
4. When assembling the countertop sections on the base cabinetry, you discover that one piece sits slightly higher than the other, resulting in an unlevel surface.
Most kitchen countertops are made up of two or more sections to reduce weight and facilitate assembly. For example, we keep the maximum size of our countertop slabs to approximately 7x3 feet for easier handling. Because the separate sections are often fabricated on different casting tables, the final thickness can vary by just a hair. Also, if the pieces don't cure properly, they may curl up slightly at the ends-so slightly that you might not notice the problem until you join the pieces together at the seams.
Unfortunately, some minor imperfections during casting are difficult to avoid. So it's always important to keep shims on hand to adjust for height differences. The type of shim you use also matters. Avoid wood shims, which can eventually rot. Use plastic shims instead, or even better, try a technique we borrowed from the granite countertop industry: Take metal screws, and drill them up through the underside of the plywood deck material the countertop is resting on. Turn the screws slowly until they raise the piece up to the desired level.
Although we find that leveling screws work best, you'll occasionally encounter situations where you don't have the working room to get a drill up through the plywood base. In that case, use plastic shims.
Also be sure to provide ample shim support. For instance, if you raise one end of the countertop 1/4 inch, don't allow all the weight to rest on just one shim or leveling screw. Complete support is needed across the entire width of the piece. This relieves stress that could lead to cracking, especially if someone applies excess weight to the countertop by leaning or sitting on it.
Another tip: Apply Liquid Nails adhesive to the plywood base in blobs and rest the countertop pieces on top of it. The adhesive will help to serve as a support during the shimming process.
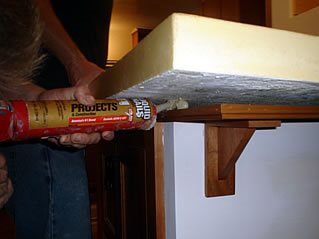
Apply blobs of Liquid Nails to the plywood base before resting the countertop pieces on top of it. The fresh adhesive will serve as a support as you shim and level the countertop sections.
5. The countertop accidentally chips or cracks during installation.
Always bring along plenty of foam and pieces of cardboard to the jobsite. The cardboard, when cut into strips about 3 to 4 inches tall and placed in the seams between countertop sections, will act as padding to help to prevent chipping at the edges when you shove the pieces together. When the countertop sections make contact with the cardboard, pull the strips out and then slowly and carefully join the sections.
Use the foam to protect the countertop sections during transport and to cushion them whenever you set them down, such as when placing them on a sawhorse for grinding the edges. Our rule of thumb: The countertop sections must always be resting on foam, never against a hard surface.
6. To accommodate bar stools, your client wants an unsupported cantilever at the end of the concrete countertop, extending out about a foot.
How much cantilever you can get away with depends, in part, on the overall strength of the countertop mix design you're working with. In general, we don't recommend allowing more than 10 inches of unsupported cantilever for a 1 1/2-inch-thick countertop. Otherwise the concrete could crack if too much weight is applied.
If you must extend the cantilever beyond 10 inches, there are unobtrusive and decorative ways to add support such as L-brackets and corbels.
7. On a remodeling project, you notice that the base cabinetry to support the countertop is made from flimsy particleboard and may not adequately support the weight.
Concrete countertops aren't as heavy as you might think. Depending on the countertop thickness and mix design, they typically weigh about 10 to 15 pounds per square foot, which is not much heavier than a granite countertop. Still, don't take any chances if you suspect insufficient support. If the homeowner's budget doesn't allow for replacement of the base cabinets, there are ways to reinforce them. Often you can simply place a piece of 3/4-inch-thick plywood on top of the cabinet to provide even weight distribution. You can also insert vertical plywood supports between the cabinet and the wall behind it and screw the cabinet to the supports.
8. After the countertop sections are in place, you grout the joints between them to ensure a seamless surface. But as the grout dries over the next day or two, it begins to shrink and sink below surface level, leaving obvious seam lines.
Our trick to prevent this problem is to grout the joints before, rather than after, joining the sections. Spread grout on the edges of the countertop sections full height right before pushing the pieces together (we use a flexible tile grout available in tubes at most large hardware stores). Then, to create a level surface, simply smooth away any excess material that squeezes out the top of the joint using a wet sponge. Because the grout completely fills the joint, top to bottom, it's less apt to sink. If it does, assure the client that you will come back and fill in the low spots.
To obtain invisible seam lines, you also must match the grout color to the countertop color. We take the same pigment used to color the countertop and mix it with the grout until we get a perfect match. This may require a bit of trial and error until you get the mix ratio just right. We always work with liquid pigments because they are easier to measure out in small quantities. We also achieve better results using a light-gray base grout as opposed to white.
Grouting seams between countertop sections in four easy steps:
- Color match the tile grout to the countertop color using the appropriate liquid pigment.
- Spread the grout on the edges of the countertop sections right before pushing the pieces together.
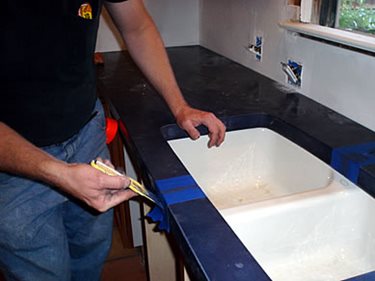
- Level the grout at the surface by smoothing away any excess material with a wet sponge. Masking the exposed countertop surfaces with painter's tape will make cleanup easier.
- Step back and admire your nearly invisible seam lines.
Solid Solutions' Install Checklist
| Circular saw with diamond blade 4-inch diamond angle grinder Cordless drill Wood and concrete drill bits Concrete coring bits Level Speed Square 2-inch-wide blue masking tape Extension cords Various clamps Large square Pencils Sharpies Razor knife Two-part epoxy Liquid Nails 100% silicone caulk (clear and colored) Caulking gun Grout for seams Mixing buckets (both 5-gallon and quart sizes) Slab cart Putty knifes Large tarp Xylene (a solvent) Battery charger 1 quart of 30-grit sand |
1 quart of white cement Pigment Sealer Finishing wax Router Jigsaw Sawzall Orbital sander Variable-speed grinder Sawhorses Broom and dustpan Sponges Clean rags Polishing stone Diamond hand pads Mixing wand Sand paper in various grits Hammer Sink clamps Sink Undermounter install kit Shop vacuum Foam blocks Ratchet straps Hack saw Wood screws Buffer |
9. As you're installing a newly delivered countertop in a homeowner's kitchen, you encounter problems you didn't anticipate. (Choose from any of the above.) Even worse, you left the tools you need to fix the problem back at the shop.
Be prepared for dealing with all potential problems by making a checklist of the tools you need to bring to every install (see our list as an example). Not only will this save you a trip back to the shop, it may also save you embarrassment, especially if the client happens to be in the room watching you, and growing more anxious by the minute.
Before leaving for the job, verify that all the items on your checklist are in your toolbox or truck.
10. You notice a minor chip in the countertop that needs patching, but you don't have any filler material on hand that matches the countertop color.
Along with hauling all the essential tools to the job, always bring a small container of the liquid pigment blend used to color the countertop, as well as some extra sand and cement or epoxy filler. You can then easily whip up a batch of color-matched patching material in a small bucket to fill in chips or other minor imperfections that may occur during countertop installation.
A final word of advice:
Before you begin any concrete countertop project, have a clear vision in your mind of what the final result should look like and all you need to accomplish to achieve that goal. That vision includes carefully assessing the worksite so you are well prepared to deal with the unexpected. For example, in case a countertop section doesn't fit against a wall, know precisely where you can or can't knock out the drywall.
It's never fun to get callbacks to fix a problem. By being prepared for the potential pitfalls, you will avoid a lot of frustration and sleep easier at night knowing your customers are satisfied.
Anne Balogh writes feature articles each month for The Concrete Network ( www.concretenetwork.com). She is a freelance writer based in Glen Ellyn, Ill., and a former editor of Concrete Construction magazine.
 White Countertop Mix
Pre-blended, all in one, high strength castable concrete mix.
 Topcoat Sealer
Produces a scratch and stain resistant top coating.
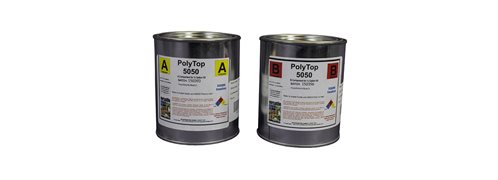 PolyTop Sealer
Designed for speed and heat resistance.
 Rock Top Sealer
Clear matte finish, water-based urethane
 Countertop Products
All the supplies needed for great countertops.
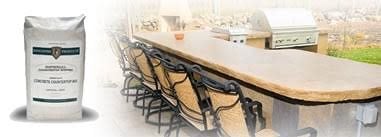 Imperial Countertop Mix
Engineered to be lightweight and strong. Minimal shrinkage.
