- Staining Concrete
- Stamped Concrete
- Concrete Overlays
- Concrete Resurfacing
- Concrete Polishing
- Concrete Dyes
- Colored Concrete
- Indoor Concrete
- Concrete Floors
- Concrete Countertops
- Garage Floor Coatings
- Furniture, Sinks, Fire Bowls
- Basement Floors
- Outdoor Concrete
- Concrete Patios
- Concrete Driveways
- Concrete Pool Decks
- Outdoor Kitchens & Counters
- Outdoor Fireplace
- Concrete Walkways
- Concrete Pavers
- Concrete Walls
- Repair & Maintenance
- Foundation Repair
- Concrete Crack Repair
- Concrete Sealers
- Building with Concrete
- Concrete Homes
- Concrete Basements
- Decorative Concrete
- Fire Resistant
Putting a Waterproof Concrete Coating over a Wooden Deck
Miracote's Miraflex II SystemWhen faced with both waterproofing and improving the appearance of an exterior plywood deck, Miracote's Miraflex II system combines a waterproofing membrane with a polymer-modified cement topping to get what looks like a decorative concrete floor. At the ASCC convention in Charlotte, Trevor Foster and George Reedy, demonstrated how to get this application right.
According to Foster, proper flashing is one of the critical elements to making the system work. Install flashing that comes down over the outside edges of the plywood and 4 to 6 inches up any walls the deck butts up against. Seal the edges of the flashing to the plywood with urethane caulk, which prevents water from wicking up and into the plywood. Seal at both the top and bottom of the flashing.
Next, install a layer of 1.75 pound per square yard galvanized metal lath and fasten it to the plywood with 22 to 28 staples per square foot using an electric or pneumatic staple gun. "Lots of guys will try to just use a couple of staples per square foot," cautioned Foster, "but that doesn't provide enough attachment to the plywood." Butt adjacent sheets of lath, don't overlap it, but do overlap it onto the flashing.

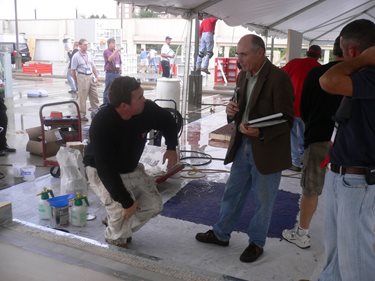
 Trevor Foster explains to Concrete Network correspondent Bill Palmer how the Miraflex II system works.
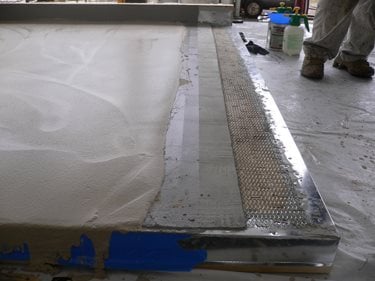
The layers can be seen in this demonstration piece, right to left: flashing, lath, underlayment, waterproofing membrane, and cementitious overlay.
Prime the wood and lath with a coat of dilute polymer resin then apply a layer of polymer modified concrete underlayment (such as Miracote's RM III) making sure it completely encapsulates the lath. and overlaps onto the flashing-stop it ½ to 1 inch short of the edge of the flashing drip edge then let it dry. This is the embedment mortar that completes the bond of the lath to the plywood.
Now it's time to apply the waterproofing. This is done with two coats of Membrane A, a single-component, fluid-applied, water-based waterproofing membrane. Each coat is 25 mils thick when wet and dries to about 12.5 mils, resulting in a 25-mil-thick layer of waterproofing. Apply the membrane over the top of the wall flashing right up to the wall, but stop it about ½ inch short of the drip edges. "Make sure the membrane comes into direct contact with the flashing," said Foster. "This is an important advantage to using a waterproofing membrane instead of a cementitious material."
At this point, you have a completely waterproof surface that could get nearly any sort of overlay. At the ASCC meeting, Foster and Reedy used a ½-inch topping of Miracote's MPC, a polymer-modified cementitious material. After it set, they saw cut circular patterns into the surface and acid stained alternate sections.
Get more details on installing the Miraflex II system (PDF).
Author Bill Palmer, ConcreteNetwork.com Columnist


