- Concrete slabs home
- Use a low water-cement ratio: How to calculate
- Subgrades and subbases for concrete slabs: Tips for ensuring good support
- Concrete Slab Finishing Tips
- DIY Slab Mistakes to Avoid
- How to Prevent Cracks
- Guidelines for preventing cracks in concrete slabs
- Be active in deciding where control joints will be placed
- Reinforcing Concrete Slabs
- Proper Curing of Concrete Slabs
- Properly curing concrete slabs: Why and how
- Related Information:
- Concrete fasteners
- Concrete forms
- The three types of concrete foundations
- Aggregates in ready-mix concrete
- Vapor barriers for concrete slabs
- Post-tensioned concrete slabs
- Concrete slabjacking
- Concrete testing
Control Joints in Concrete
When to cut control joints and proper spacing
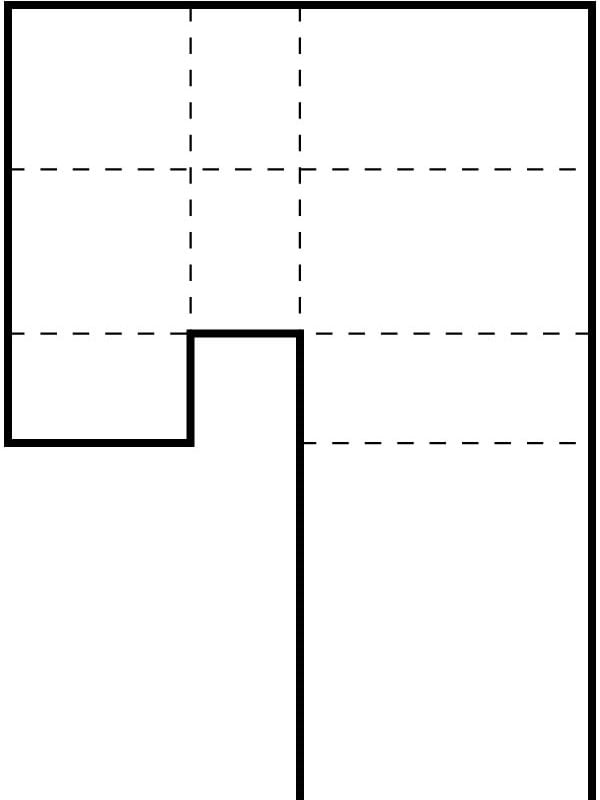
Correctly laid out joints. Note: Inside corners, where cracks would typically occur, have correctly placed joints.
It is important to be active in deciding where control joints are placed. Often, jointing is not taken seriously enough and the "sawcutter" comes to your job and puts the cuts where he feels they belong or where it is convenient for him. And, most plans don't have joint spacing marked on them. So don't leave this important part of concrete construction to chance.
Find local concrete contractors to help with your project.
WHAT ARE CONTROL JOINTS?
Control joints are planned cracks which allow for movements caused by temperature changes and drying shrinkage. In other words, if the concrete does crack-you want to have an active role in deciding where it will crack and that it will crack in a straight line instead of randomly.
WHEN TO CUT CONTROL JOINTS
Make sure you are cutting joints soon enough. In hot weather, concrete might crack if joints are not cut within 6-12 hours after finishing concrete. In this condition, if you don't want to use a grooving tool to cut joints, there are early-entry dry-cut lightweight saws that can be used almost immediately after finishing. These saws cut 1" to 3" deep, depending on the model.
CONTROL JOINT SPACING
Space joints (in feet) no more than 2-3 times the slab thickness (in inches). A 4" slab should have joints 8-12 feet apart.
When arranging joints, skilled contractors will often use them to create an attractive diamond pattern. If your concrete will be stamped, ask about the best ways to avoid interrupting the pattern with control joints. Watch this video for a good solution: Pouring Concrete with Zip Strips.
Concrete Groover Video (Placing Control Joints in Fresh Concrete)
Time: 03:11
MORE JOINTING TIPS
- Cut joints deep enough
Cut joints 25% of the depth of the slab. A 4" thick slab should have joints 1" deep. - How to cut joints
Groover tools cut joints in fresh concrete. Saw cutting cuts joints as soon as the concrete is hard enough that the edges abutting the cut don't chip from the saw blade. - Place joints under walls or under carpet areas
Under walls they won't be seen. Under carpet areas the joints won't have a chance to telegraph through vinyl areas. - Avoid re-entrant corners
Planning the joint pattern can sometimes eliminate re-entrant corners.
Get more tips for creating contraction joints in concrete slabs.
CONTROL JOINT VS. EXPANSION JOINT
Control joints are meant to control cracking, while expansion joints are meant to allow for movement. Expansion joints, or isolation joints, are used between two different concrete pours, or where concrete meets with another material or even a structure. Expansion joints are more common on big commercial projects and often aren’t required when pouring residential slabs. These joints usually require filling, especially if the concrete is going to be polished or finished with a coating (see Sealing Joints in a Concrete Slab).
 Brickform Ultra-M1x
Add color and fiber with one product
 Rescue-Pak
Contains six of the most effective admixtures
 UltraFiber 500®
Will not ball or fuzz, accepts color


