- Concrete Stain Home
- Get the Look - Stained Floor Pictures
- Color Chart: Concrete stain colors
- Comparison Chart: Compare acid stains, water-based stains and dyes
- Stain Buying Tips: Questions to ask before you buy
- How to Stain Concrete
- Types of Stains and Coloring Options
- Acid-Based Stains
- Water-Based Penetrating Stains
- Concrete Dyes
- Concrete Paint
- Exterior Concrete Stain: Click through images of outdoor stained concrete projects
- Stains and Equipment Product Reviews
- Troubleshooting Concrete Stains
- Common Staining Issues: Tips from expert Chris Sullivan
- Removing Stains from Concrete
How to Stain Concrete
A step-by-step overview of how to apply concrete stain
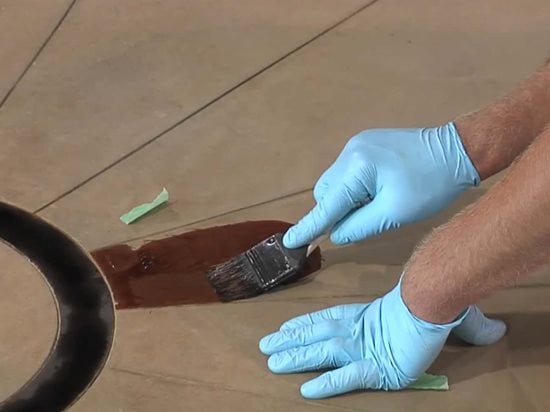
The four steps for staining concrete are: surface preparation, stain application (pictured), residue removal and sealer application.
Staining concrete is a great way to add color to an otherwise dull surface. The concrete staining process takes about 2 days, is moderately difficult and fairly affordable. New concrete should be fully cured before staining, which takes between 21 and 28 days.
Whether you're a professional wanting to add staining to your repertoire or a homeowner who loves a DIY challenge, here are the steps for staining concrete:
- Clean and prepare the concrete
- Apply the concrete stain
- Clean up and neutralize the stain
- Seal your concrete for long-term protection
Need help with your project? Find contractors that specialize in concrete staining near me.
STAIN TYPE & COLOR
Before getting started, you’ll need to decide on the type of stain you’ll be using and what color. Acid stains are great for creating rich, variegated earth tones. Water-based stains offer more color choices, are user-friendly and safe.
There are a few differences between how acid and water-based stains are applied. Acid stains need more time to react with the concrete and require neutralization, while water based stains need additional surface preparation to open up the concrete.
STAINING MATERIALS
- Concrete stripper (sealed concrete only)
- Concrete cleaner or degreaser
- Etching solution (water-based stains only)
- Concrete stain
- Neutralizer (acid stains only)
- Sealer
- Roller or sprayer
- Mask or respirator
- Gloves
- Goggles
- Rubber boots
- Scrub brush
- Plastic bucket
- Booties
- Pressure washer
- Scraper
- Hose with spray nozzle
- Shop vacuum
- Plastic sheeting
- Tape
FOLLOW THESE STEPS WHEN APPLYING CONCRETE STAIN
-
Prepare the Surface for Staining
Whether you are staining new or old concrete, thorough surface preparation is essential. Unlike paints and coatings, which are opaque and can mask many evils, acid stains are translucent. Any residue remaining on the surface of the concrete is likely to be visible through the newly applied stain. When done properly, this initial step dramatically impacts the finished appearance of the project. Surface preparation can be done in two ways, either by mechanical grinding or with the use of a specially formulated cleaner (often available from your stain manufacturer). Learn more about surface preparation before staining concrete.
-
Apply the Concrete Stain
After the concrete has been cleaned or ground, it is time to apply the actual stain. Here's how:
- Mask off area to protect door frames, walls, etc.
- Dilute stain with water to desired ratio (see your manufacturer’s recommendations for specifics).
- Spray or brush on first coat. Popular sprayers include airless sprayers, HVLP sprayers, production guns, pump sprayers or even a trigger spray bottle. A brush or sponge may be used for cases that require precise control of the stain application.
- Let the newly applied stain dry. Dry times will vary based on temperature, humidity and air flow. In optimum conditions, the concrete will be dry to the touch in 15-20 minutes; however, the total cure time is 24 hours.
- Repeat if more color intensity is desired. Most stain manufacturers recommend waiting a few hours between applications.
-
Clean Up & Neutralize the Stain
Once the stain has been applied, cleanup is required. Here is a standard cleanup process:
- Rinse the concrete with clean water until the water runs clear.
- Neutralize the stain with T.S.P., baking soda or ammonia. This is only necessary if you are using an acid stain, water-based stains do not require neutralization.
- Use a soft bristled brush or broom to loosen any stubborn residue before the final rinsing.
-
Add a Protective Coat of Sealer
After allowing the stained concrete to dry overnight or longer, apply your sealer of choice. Most stain manufacturers recommend applying two coats of sealer for optimum durability. The type of sealer you use will depend on whether the concrete is indoors or outdoors and what level of gloss is desired (see Concrete Floor Sealers). In addition to the sealer, a floor finish or wax can be applied for extra protection against scuffs and scratches.
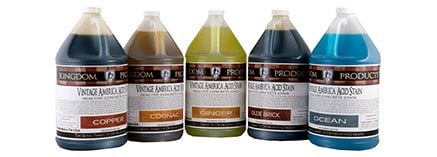
 Vintage America Acid Stain
Organic, antique patina, deep penetrating reactive stain.
 Acid Stain by Surfkoat
Makes up to 2 gallons. Great for marble look.
 Stain-Crete by Increte
9 standard colors. Useful for old or new concrete.
 Elements® Transparent Concrete Stain
Water-based, environmentally and user-friendly
 Concrete Stain + Sealer in One
Waterproof, strengthen, preserve and beautify in one step
 Stone Tone Stain
10 color options. Resistant to chipping and fading.
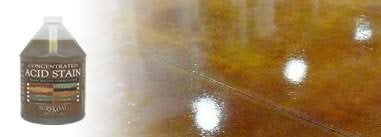
 Concrete Acid Stain
BRICKFORM Blush-Tone Acid Stain available in 10 standard colors
 In-Fluence Water-Based Stain
24 non-reactive colors that transform concrete.
IS STAINING A DIY PROJECT?
Wondering if you can stain your concrete floor or patio yourself? Learn about whether applying stains is a DIY project or if you'd be better off to hire a pro.
STAIN APPLICATION TIPS
Staining concrete successfully requires a deft hand and a discerning eye. Here are a few tips for getting the best results:
- Be scrupulous with surface preparation to ensure removal of contaminants or defects that could ruin an otherwise beautiful staining job. (See Cleaning Floors Before Concrete Staining.)
- Carefully mask off surrounding areas to avoid unintentional staining - acid stains can be tough, and sometimes impossible, to remove.
- Always apply a test sample of stain to a small, inconspicuous area of the concrete to be treated. Because so many variables can affect the final color, that's the only way to get an accurate preview of the finished look.
- Stain colors will be more intense if you apply the stain soon after the concrete has been placed.
- Follow the stain manufacturer's directions. Acid-based chemical stains often have different requirements than acrylic stains for surface preparation, application and cleanup. Manufacturers can also recommend the best application tools and coverage rates for their products.
- To produce various concentrations of color, you can dilute the stain by adding water, either by wetting the concrete before the stain is applied or by spritzing the concrete after stain application with water from a spray bottle.
- Don't expect color consistency or perfection. Variations are inherent in the staining process.
- To treat areas that did not stain well, try applying a concrete dye or tint.
- When using an acid-based stain, be sure to remove any residue remaining on the surface so the sealer will bond properly. Use a mixture of water and detergent, adding a tablespoon of baking soda per gallon of water to neutralize any remaining acid. Scrub with a buffing machine, and then pick up the residue with a wet vacuum. Rinse until the water is clear.
- Protect your newly stained surface with a sealer. Be sure to select a product that’s compatible with the stain you’re using.
ADVANCED TECHNIQUE: GELS AND THICKENERS GIVE YOU MORE CONTROL
Stains are often used in conjunction with stencils to produce intricate patterns, custom graphics, and logos. But because stains tend to be thin solutions to ensure good penetration, it can be a challenge to prevent them from bleeding under the stencil or to keep the application within defined pattern lines. An easy way to conquer this problem is to use a special thickening agent or gel that improves application control and permits freehand artistry.
An example of a thickening agent is Surface Gel Tek's Stain Mule. This product is designed to be mixed on the jobsite with acid or water-based stains to eliminate color bleeding or wicking. It also helps to prevent dripping of stain on vertical surfaces.
Another option is a gel stain developed for extra control when creating intricate patterns and crisp edges or lines. It dries to a natural, variegated finish and can be applied with a sponge or bristle brush.


